GTO Paint Removal RestorationTechnique
Good bodywork is the foundation of a quality paint job. You can't have one without the other. How many times have you looked at a shiny, new paint job at a distance only to inspect it up close and find a visual nightmare of poor panel alignment, waves, and sanding scratches? This is the result of a lack of preparation for the paint. This tip lays the foundation for proper body work by explaining each paint removal technique and helping you choose which method works for your restoration.

For a comprehensive guide on this entire subject you can visit this link: LEARN MORE ABOUT THIS BOOK HERE
SHARE THIS ARTICLE: Please feel free to share this article on Facebook, in forums, or with any clubs you participate in. You can copy and paste this link to share: https://www.cartechbooks.com/blogs/techtips/gto-paint-removal-restoration
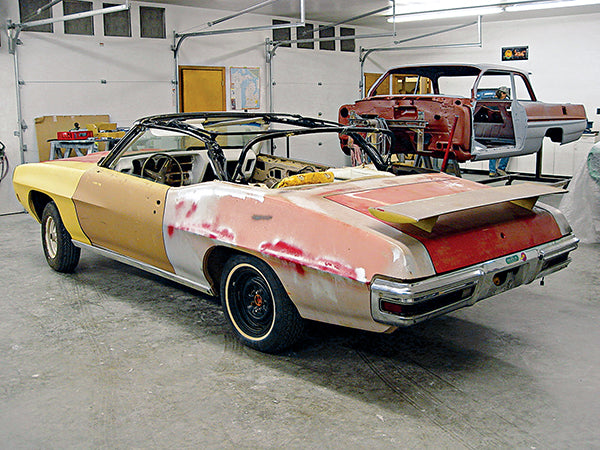
Looks can be deceiving. This 1970 Judge convertible seemed to have a solid body not requiring extensive body work. However, it was hiding some significant problems. In addition to both rear quarters needing to be replaced, it needed new floorpan panels, as well as new portions of the trunk floor. The interior was removed to reveal that the floorpans were rusted in certain areas and needed to be replaced. Inspecting the trunk also revealed a certain amount of rot that necessitated patches. While both quarter panels seemed to be solid from the outside, a lot of rust was lurking around the wheel wells and these needed to be replaced. (Photo Courtesy Scott Tiemann)
Typical Rust Areas
From 1964 to 1972, Pontiac GTOs were built on the same GM A-Body that was shared with the Chevelle, Skylark, Cutlass, and of course, the Pontiac Tempest and LeMans. As you expect from cars sharing the same basic platform, they all suffered from the same problem areas where water and road salt collect and corrode sheet metal.
The windshield and backlight areas are prone to window gasket failure, which lets water collect in those areas. As the corrosion progresses, the moisture moves downward and the corrosion follows. In the front, the windshield base is compromised, as are the cowl and firewall areas. Out back, water can collect in the trunk floor, the seams of the trunk wells, the rear quarters, and wheel wells. At the same time, road salt and water are working on the mating seams of the rear quarters and outer wheel wells, as well as the rocker panels.
Fortunately, all unrestored GTOs don’t end up as rusted-out parts cars. While it is tough to find a solid GTO in the Northeast or Midwest, the elements are far kinder to Southern and Southwestern examples. Regardless of what corrosion damage you might find, if the overall structural integrity of the car is still sound, often the car is a good candidate for restoration.
Paint Removal
A proper foundation for paint means removing old paint. Many body shops scuff up and paint over an existing finish to save time and money. While this might be fine for repairing a fender-bender or freshening the look of a used car for resale, it is necessary to remove the paint down to the metal so you have the best paint adhesion and of course the best results. Not doing so is putting way too much faith in old materials and labor you really aren’t familiar with. Taking the time to do it right will give the results that you want-no one wants to see a substandard finished product every time you open the garage.
There are several methods for paint removal and if done correctly, each does a very good job. Each has certain benefits and drawbacks. When each method is done incorrectly, the results can be disastrous.
Sanding
It’s tedious, time-consuming, and messy, but it is the time-honored method of paint and rust removal. There is a balance here that has to be maintained-the balance between saving time and being too aggressive with the paper grit. If you are using a right-angle grinder/sander, be very careful, as it can generate enough heat to warp sheet metal. It also removes more metal than necessary and leaves very deep scratches, which can add time to repair. A dual-action (DA) orbital sander is not as aggressive-it is easier on the metal but takes longer to accomplish the same job.
My suggestion is to start with a less-aggressive grit and use a DA orbital sander. As you become more familiar with how they perform, you can get more aggressive with the paper grit, maybe even switch over to a right-angle grinder and work from there.
Chemical Stripping
Chemical stripping falls into two categories of application-industrial and brush-on. In the industrial application, the entire body is dipped in huge vats filled with an acid or alkaline solution that takes off all paint and rust, leaving only the bare metal. Brushing on a chemical stripper softens paint and filler, making it easy to scrape off, revealing clean, bare metal. I have worked with both and no matter how you do it...it ends up a gooey mess.
The brush-on application is a practical way for the at-home restorer to strip the paint from the body. In addition, it is a good way to get paint and filler off large panels, such as roofs, hoods, decklids, and doors.
I have had good luck using stripper on the main area of a hood, while leaving the edges for a sander later. That way, I took advantage of the time-saving chemical strippers offered while still preventing damage to new paint in the future.
Whatever brand of stripper you use, make sure you have plenty of ventilation as the fumes can be strong. Gloves are mandatory as well, as chemical strippers can cause severe drying of the skin and/or chemical burns.
If you have the option to take the body shell and panels to a commercial company to do the stripping for you, it is a big time-saver, albeit a fairly expensive one.
Acid Dipping: Acid dipping is also known as chemical milling. In addition to removing all paint, primer, and filler, it also removes a certain amount of the metal, depending on the amount of time the part is immersed. Race car builders have used the process for decades to remove weight from a car body while still maintaining the original material and appearance. The downside to acid dipping is that it is corrosive to metal. It also tends to work-harden it. There is also the possibility that if not properly rinsed, acid can remain in seams and other areas, destroying paint and causing further corrosion.
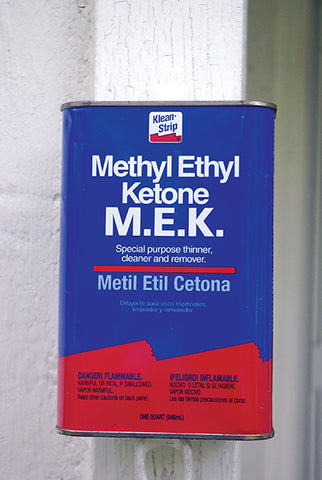
Chemical strippers work well but are messy and disposal can sometimes be a problem. They are applied with a brush, and due to their viscosity, they stick to vertical surfaces without dripping off. The stripper doesn’t need a thick coat to be effective, but it does need some time for the paint to start bubbling and lifting. The directions say to let it sit for 30 minutes to three hours but I suggest letting it sit for at least three hours. After the paint is lifted, scraping with a putty knife is necessary. You may have to apply a second coat or wire brush off the primer coat to get it off. (Photo Courtesy Eastwood Products)
Alkaline Dipping: Alkaline dipping uses liquid on the other end of the pH scale from acid. The advantage is that while it is very effective at getting rid of rust and bondo, it leaves the “good,” or non-corroded, metal alone. This process is costly and the alkaline must be removed from the seams to prevent potential paint damage. Given the choice of the two, the alkaline process is better for restorations. The RediStrip process is offered at franchises around the United States and is especially good for restoration work.
As with acid dipping, be careful about getting the stripper in body seams and other places where it can be trapped and cause paint damage later.
Media Blasting
For many years, sandblasting was the only available form of media blasting. While it is very effective at removing rust, paint, and old filler, it is a process that can easily destroy sheet metal, both from the abrasive action and from the frictional heat it develops. Plus, if you aren’t careful, you could blast a hole right through a fender. Sandblasting sheet metal requires an even technique and inexperienced restorers destroyed many parts learning this lesson.
Today, new processes are just as effective without the detrimental effects of sand, most notably soda blasting. While soda blasting might sound like spraying a Coke or Pepsi firehose at the body, it actually refers to baking soda (sodium bicarbonate). If you look at it under a microscope, you see that it is not really a powder but is actually crystalline. When the media is accelerated to high speed, millions of tiny explosions occur and the paint is stripped away.
Baking soda is fine enough as a very gentle paint remover. In fact, it is so gentle that you can remove one paint layer at a time. Best of all, you can save time by not having to mask everything off, as the soda does not hurt chrome, rubber, or glass. Obviously, this is not the most effective means of rust removal, but it takes off light to moderate surface rust on sheet metal. In addition, unlike sandblasting, you won’t risk warping or blowing a hole in the sheet metal. For paint removal, it’s a very good choice. The media leaves a rust-inhibiting coat on the bare metal, which needs to be cleaned off before priming or painting.
Equipment can be rented or purchased, and certain companies will do the job for you. Eastwood and Harbor Freight, among others, have a wide variety of reasonably priced kits and soda media for home use. Eastwood also sells a combination of baking soda and aluminum oxide, which is formulated to work with its blaster and more effectively remove rust, though it does harm trim and glass.
Media blasters come in many different types and sizes. Sandblasters have been around for quite a long time and effectively strip the paint and rust off the body panels of your A-Body car. For the home restorer, soda blasters, which use baking soda as the medium, are a great choice, as they are fairly inexpensive, safe to glass and trim, strip paint very quickly, and are environmentally friendly. They also leave a rust-inhibiting coating, which needs to be removed before priming and painting. The blaster works just like a sandblaster, using an air compressor, a hopper for the baking soda, and a hose and nozzle. Work the area carefully to avoid stripping any area you want to preserve, and be sure to wear proper clothing, eye protection and a respirator. (Photo Courtesy Eastwood Products)

Of course, there are other types of abrasive media such as plastic, pulverized walnut shells, even dry ice. For the home restorer, the soda blaster represents the best overall media-blasting system available, from the standpoints of cost, ease of use, safety to delicate trim, and ease of disposal. Baking soda is eco-friendly and you are not trying to get rid of non-biodegradable refuse, as with the acrylic medias used in plastic media blasting. The equipment is not terribly expensive, it is ridiculously simple, and for all intents and purposes, it’s idiot-proof. Where you can quickly and easily cause sandblast damage, the soda blaster is much more forgiving without having to sacrifice results. When you add that up and see how quickly it does the job, combined with the ease of disposal, the choice really is a no-brainer.
For a comprehensive guide on this entire subject you can visit this link: LEARN MORE ABOUT THIS BOOK HERE
SHARE THIS ARTICLE: Please feel free to share this article on Facebook, in forums, or with any clubs you participate in. You can copy and paste this link to share: https://www.cartechbooks.com/blogs/techtips/gto-paint-removal-restoration