Repair a Crack in a Corvette’s Bodywork
by Daniel Burrill with Jeffrey Zurschmeide
Fiberglass automotive bodies are lightweight and resilient but not indestructible. When a fiberglass body makes contact with a solid, heavy object, it doesn’t bend, divot, or crease like steel automotive bodies; rather the fiberglass body cracks or breaks. The materials and techniques for repairing fiberglass are far different than ones used for repairing sheet metal.
This project fixes a crack in the fiberglass body of a 1977 Chevrolet Corvette. The crack begins on the top of the right rear fender and has propagated under the paint to the apex of the right rear wheel arch. The crack is in the actual fiberglass panel, so it must be repaired and cannot be smoothed over with filler. In fact, someone did smooth it over with filler in the past, and the crack has continued to worsen under the paint!
THIS TECH TIP IS FROM THE FULL BOOK: HOW TO FABRICATE AUTOMOTIVE FIBERGLASS & CARBON FIBER PARTS
For a comprehensive guide on this entire subject you can visit this link: LEARN MORE ABOUT THIS BOOK HERE
SHARE THIS ARTICLE: Please feel free to share this article on Facebook, in forums, or with any clubs you participate in. You can copy and paste this link to share: https://www.cartechbooks.com/blogs/techtips/repair-crack-corvette-bodywork
Total Cost:
About $50 in materials, assuming you already own the tools.
Tools Needed:
• Dual-action sander and sanding discs from 80 to 200 grit
• 4½-inch body grinder
• Long-block hand sander
• Halogen shop light
• Plastic spatula
Supplies Needed:
• Fiberglass cloth
• Resin and catalyst
• Duraglas body filler
• Primer
• Plastic mixing cups, wooden stirrers
Time to Work:
About 8 hours, spread over several days
Follow These Steps:
1. The crack in this Corvette’s fiberglass is on top of the right rear fender. Because of the location and severity of this crack, we need to get access to the underside of the fender. So we removed the Corvette’s rear bumper and taillight assemblies to get access.

Where the paint has chipped away, you can see a crack in the fiberglass. This needs a proper repair or it will continue to come back, no matter how many coats of paint you put over it.
2. While we were removing the rear end of the car, we also used our dual-action air sander to scrub off the paint around the crack, and we found that the crack had been covered with Bondo and paint before, and it had flexed enough to propagate the crack down toward the wheel arch.
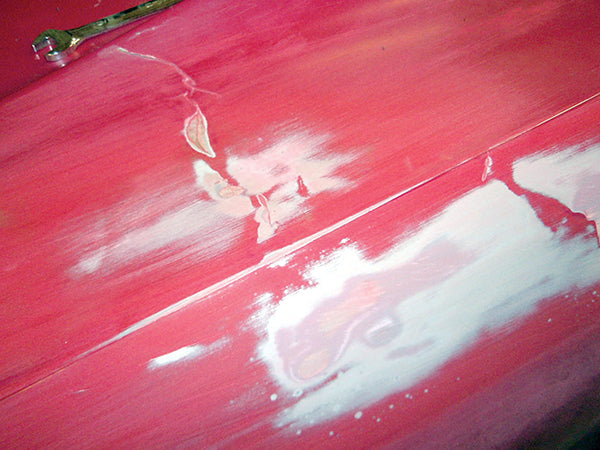
When you’re working with a crack in fiberglass, you usually have to sand enough around the flaw to find out how far the crack extends. This requires filling and smoothing when you’re done.
3. When we got the back end of the car removed, we were able to look at the backside of the crack, and of course, we found a big patch of old body filler stuck to the underside of the fender. This was not a very effective repair. It’s the equivalent of treating a broken bone with a heavy coat of makeup.
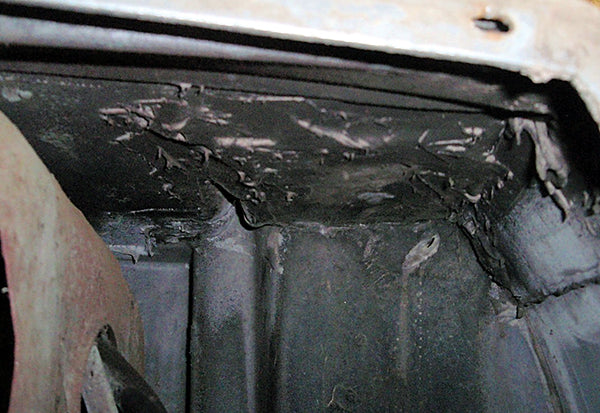
You can see the Bondo slopped onto the backside of the crack; this does nothing to fix the problem, however.
4. To fix such a crack, you must first grind away all paint, body filler, and some material around the topside of the crack with your sander or angle grinder and flapper wheel. Use your body grinder to get rid of any Bondo or other material from underneath or on the backside of the crack, being careful not to do further damage to the fiberglass body.
5. Working from the back or underside of the fender, lay down a layer of resin and then fiberglass cloth with more resin to support both sides of the crack. Because this area is hidden, you can apply as many layers as necessary (two or three should be plenty) to support the sides of the crack. Fiberglass reinforcing mesh sold for wallboard repairs is a great choice for a supporting material.
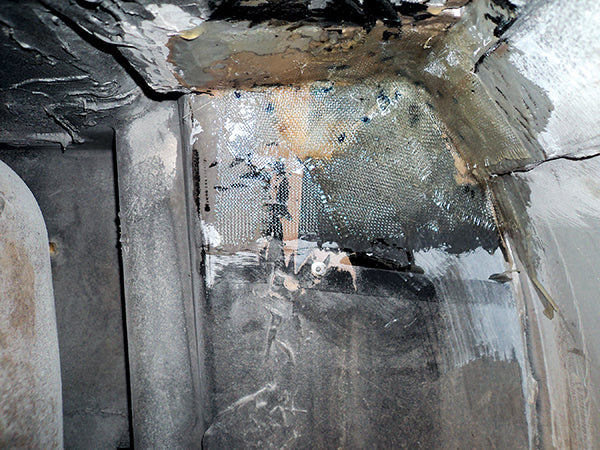
Here’s the repair on the underside of the fender. This layup holds the two sides of the crack together and supports the surrounding area.
6. On the top side of the repair, apply resin and a single layer of fiberglass cloth, and then leave the project to set up overnight. To make sure everything stays warm, you can use a basic halogen work light from the discount tool store and place it inside the fender on the frame rail. This keeps your new fiberglass toasty warm if it’s cold in your garage. Just be sure that your glass doesn’t get too warm so you don’t create a fire danger. Check on it frequently.
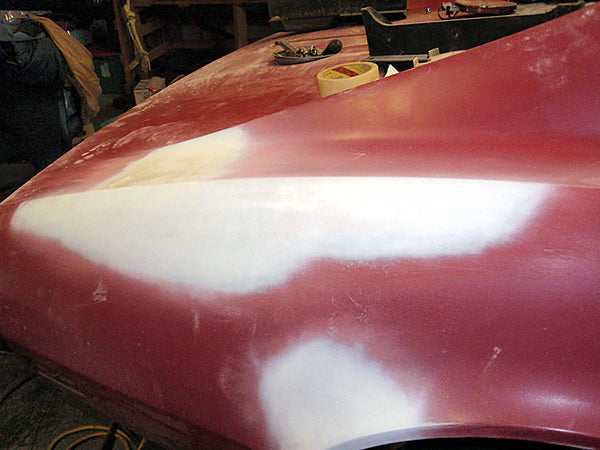
7. After the basic fiberglassing is done and cured, grind the topside of the repair level with the surrounding bodywork, and then mix up and apply some Duraglas or other fiberglass-based body filler. When this material has cured, you can use the dual-action to sand it smooth, still being careful to respect the cut-lines in the bodywork.

The fiberglass cloth splint has been placed over the outside of the crack. We’ve already sanded it down level with the surrounding bodywork.
8. Once the basic shaping is done, you can make similar repairs to any other cracks in the same area. The same techniques apply: layers of mesh and glass cloth spanning the crack, then sand that down, and use a thin layer of filler to smooth everything out. Finally, spray some gel coat in preparation for primer and paint.
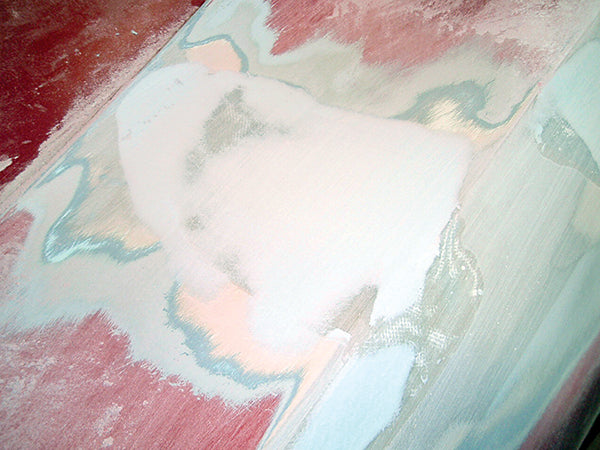
After another round of sanding, you can apply some Duraglas body filler to the area. It is the new pink filler in the center.
9. Once you are happy with the smoothness of the repair, fine-tune the edges and the smoothness with your long-block sander and some careful hand work. Gel coat and high-build primer really helps with this part. When the whole repair area is dead smooth and the repair completely invisible, you should put one final coat of primer on the surface to protect the area until you’re ready to paint.
When everything is done and smooth, hit the area with one last coat of primer so it’s ready to paint.
THIS TECH TIP IS FROM THE FULL BOOK: HOW TO FABRICATE AUTOMOTIVE FIBERGLASS & CARBON FIBER PARTS
For a comprehensive guide on this entire subject you can visit this link: LEARN MORE ABOUT THIS BOOK HERE
SHARE THIS ARTICLE: Please feel free to share this article on Facebook, in forums, or with any clubs you participate in. You can copy and paste this link to share: https://www.cartechbooks.com/blogs/techtips/repair-crack-corvette-bodywork