Perrin Short Ram Intake Subaru Installation
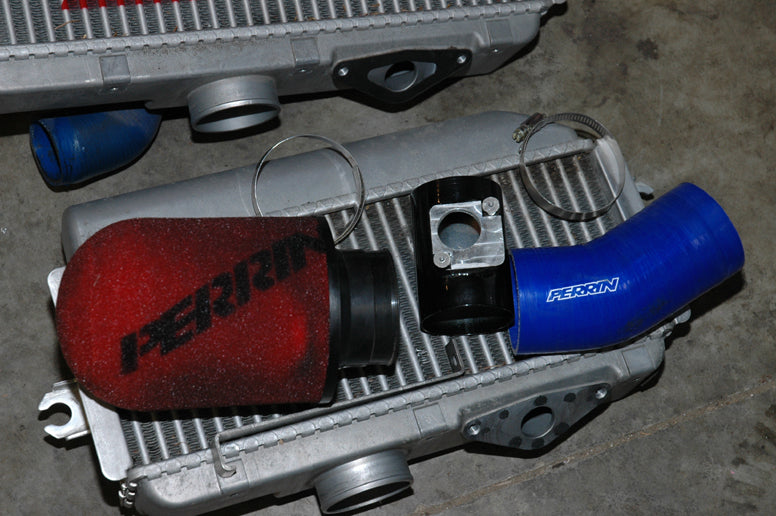
Here's the setup we're installing today. You need the air filter, MAF housing, silicone inlet pipe, mounting bracket and three hose clamps, including the two you're going to take off the stock setup.
 Find more tips like this in the book: HIGH-PERFORMANCE SUBARU BUILDER'S GUIDE
Get your copy here!
SHARE THIS ARTICLE: Please feel free to share this article on Facebook, in forums, or with any clubs you participate in. You can copy and paste this link to share: https://www.cartechbooks.com/blogs/techtips/subie_shortram
You can easily install a short ram air filter system in your garage with basic tools. This procedure was documented on a stock 2004 WRX. Follow these steps:
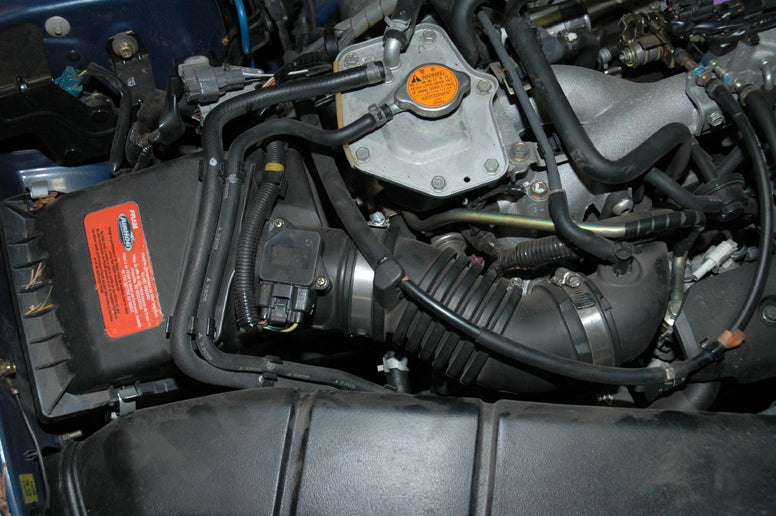
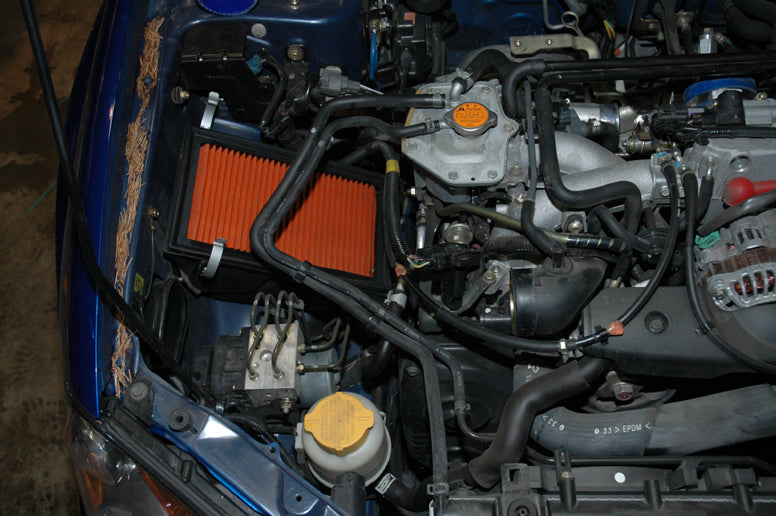
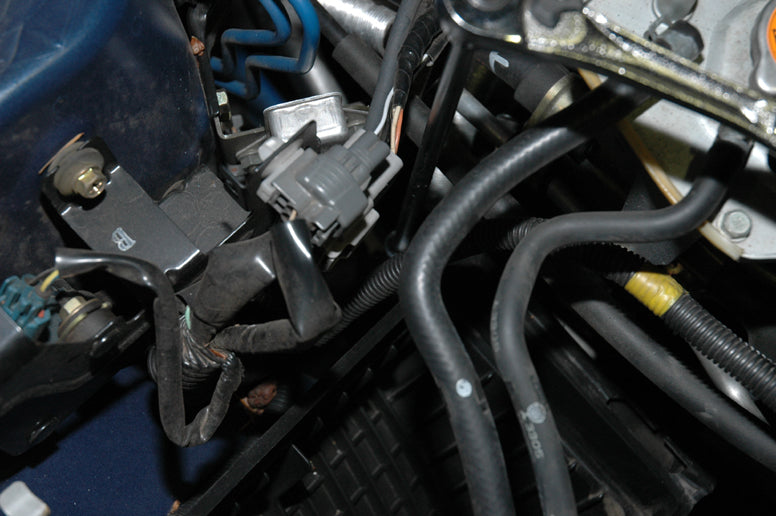
1. Disconnect your battery and make sure you have all the necessary tools. You need a #2 Phillips and a flat-bladed screwdriver, a 12mm wrench, and if possible, a 12mm socket on a long extension. Consider the picture before you get into the engine compartment. The parts you're looking for are towards the front on the passenger side of the car. Note the MAF, the two hose clamps, and the plastic inlet tube.
This is the air filter assembly. Note the position of the MAF at center-left, held on with two Phillips screws and connected to a wiring harness.
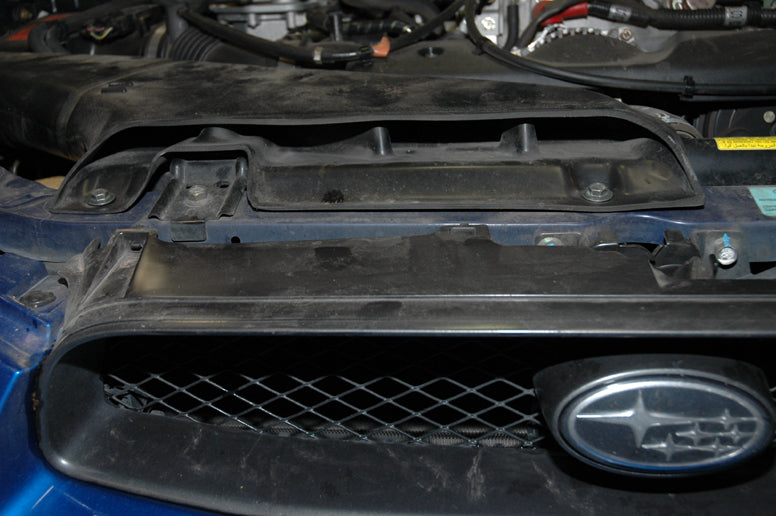
2. Use your 12mm wrench and release the intake from the front of the engine bay and pull it out. This piece is a simple push-fit into another plastic piece that travels through the fender wall and comes back out at the filter box. You can leave this other piece in place.
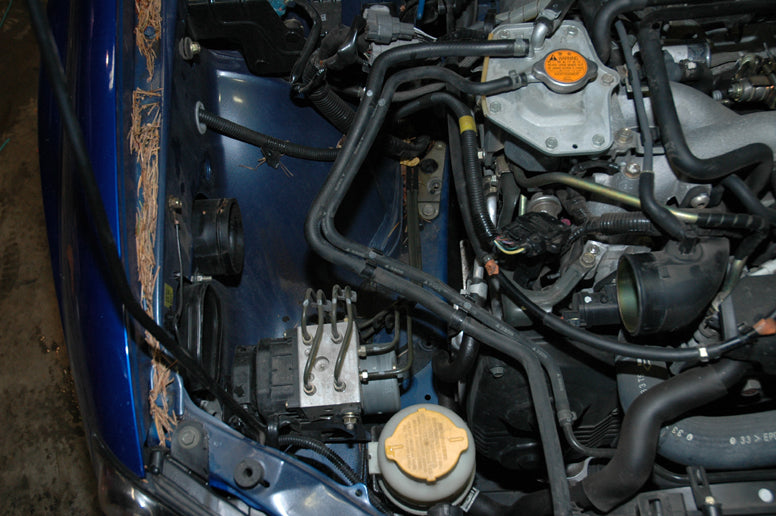
This is the stock air inlet, perfectly positioned to suck in water, dust, and all kinds of bad stuff as you drive.
3. Two long hose clamps attach the inlet tube from the air filter box to the turbo inlet pipe. Loosen these with the flat-head screwdriver, but leave them in place for now.
Loosen the two hose clamps around the tube from the air filter box to the turbo inlet pipe, but don't remove them just yet.
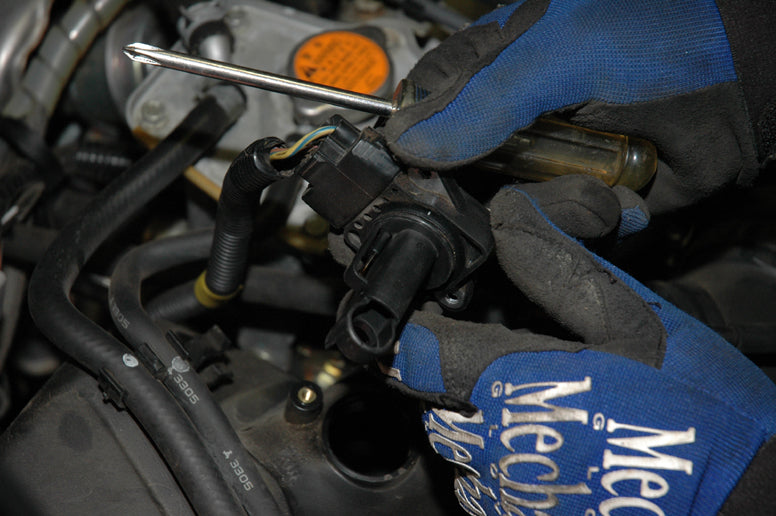
4. Note the orientation of your MAF, because it fits only one way on the MAF housing, and your car will not run right if you install the new MAF housing backwards. Carefully remove the MAF using your Phillips screwdriver and set it aside. You do not need to disconnect the wiring, but make sure your MAF is out of harm's way.
This is the MAF. There's a small filament in there that heats up and registers the airflow by electrical resistance.
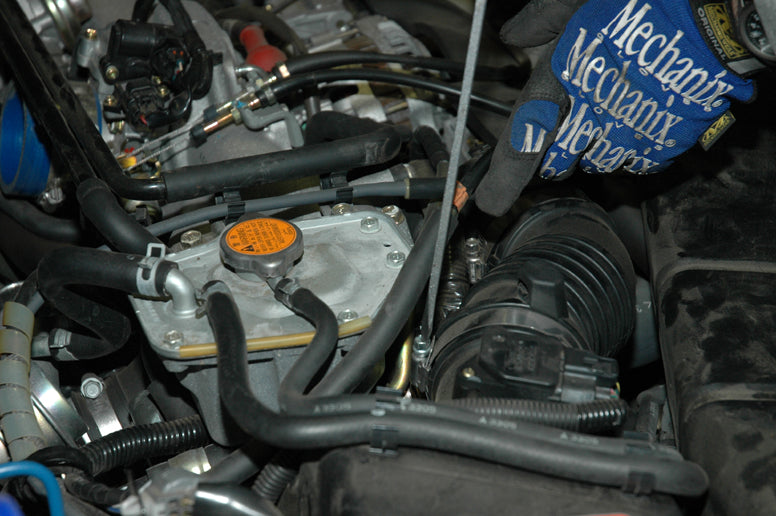
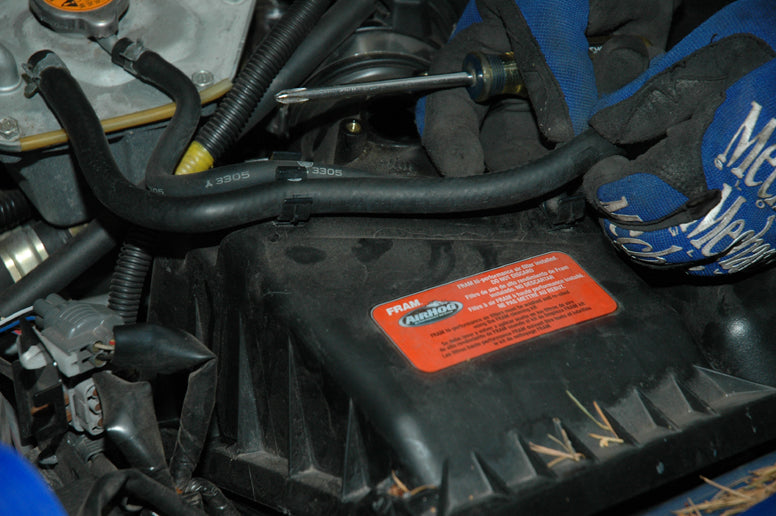
5. Lift the coolant hoses out of their holders on the top of the air filter box, then undo the two spring clips around the top of the box and remove the top and the filter element. Next, remove the inlet tube and save the hose clamps to install your new kit.
Pop the two coolant hoses out of their holders on top of the air filter box.
Find more tips like this in the book: HIGH-PERFORMANCE SUBARU BUILDER'S GUIDE
Get your copy here!
SHARE THIS ARTICLE: Please feel free to share this article on Facebook, in forums, or with any clubs you participate in. You can copy and paste this link to share: https://www.cartechbooks.com/blogs/techtips/subie_shortram
Undo the spring clips and remove the top of the filter box.
6. The filter box is attached to the chassis with two bolts. One of these is on the forward side of the box and the other is on the rearward side. Use a long extension and your socket to remove these bolts, but don't lose them. Once they are removed, you can lift out the air filter box.
There are two bolts that attach flanges on the outside of the filter box to the chassis. This shot shows the socket extension going down to the forward bolt.
And next remove the second bolt on the rearward side.
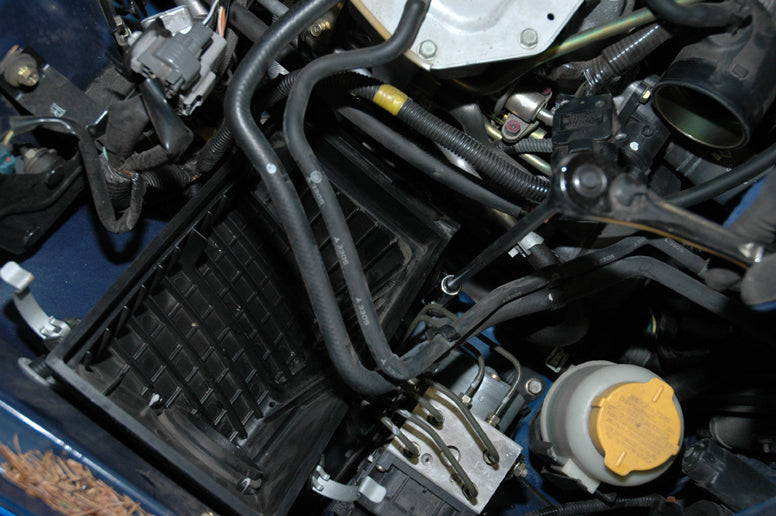
With the air filter box and inlet tube removed, you're ready to install the new filter assembly.
7. Install the support bracket in the forward hole used to mount the old air box. There's a hole in one end of the bracket for this purpose. The other end has no hole, and will not support the air filter. Note the little “hook” shape on the top of the bracket. Point the hook at the turbo inlet tube, and snug the bolt down finger-tight, but not so tight that you can't rotate the support bracket. You should also replace the rearward bolt at this time, in case you ever need to reinstall the stock air box.
The mounting bracket is a long piece of metal bent at either end. Bolt the end with a hole in it to the forward mounting hole for the old air filter box.

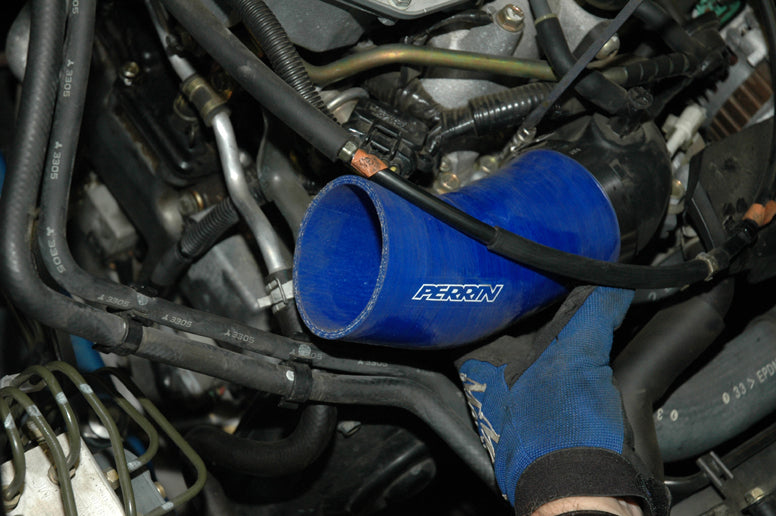
8. Slide the silicone inlet tube and a hose clamp over the turbo inlet pipe and snug down the hose clamp-don't tighten it yet, because you still need to get everything positioned correctly.
The silicone tube should fit snugly on the turbo inlet pipe. Just barely snug down the hose clamp, and be sure to orient it so that you can tighten it easily.
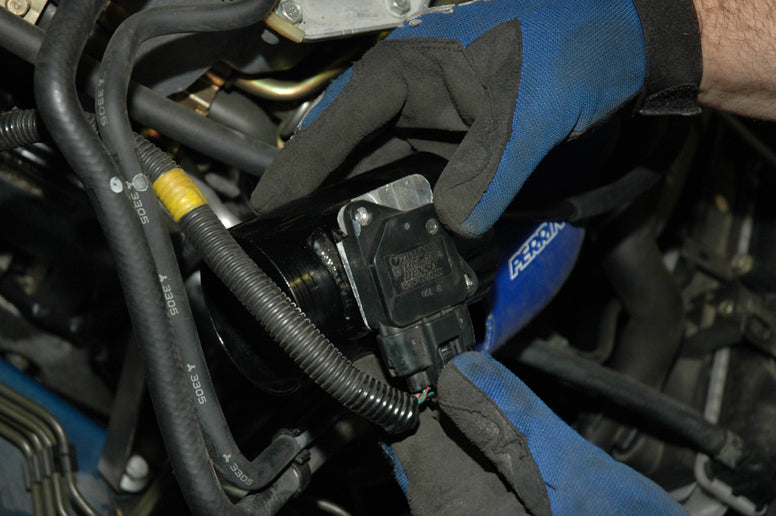
9. Test-fit the MAF and make sure that you've got the MAF housing turned the correct way. Remember that the MAF fits only one way into the housing. The wiring harness should point towards the front of the car.
The MAF housing is made to fit just one way-make sure the MAF is oriented as it was in the stock setup.
10. Slide the second hose clamp over the silicone inlet tube and the MAF housing into the inlet tube. Make sure that the hose clamp runs under the hook on the support bracket, then snug down the hose clamp, but don't tighten it.
Fit the MAF housing into the silicone inlet, and make sure the hose clamp encompasses the support bracket. When everything is aligned and fitted correctly, tighten the clamps and the support bracket bolt.
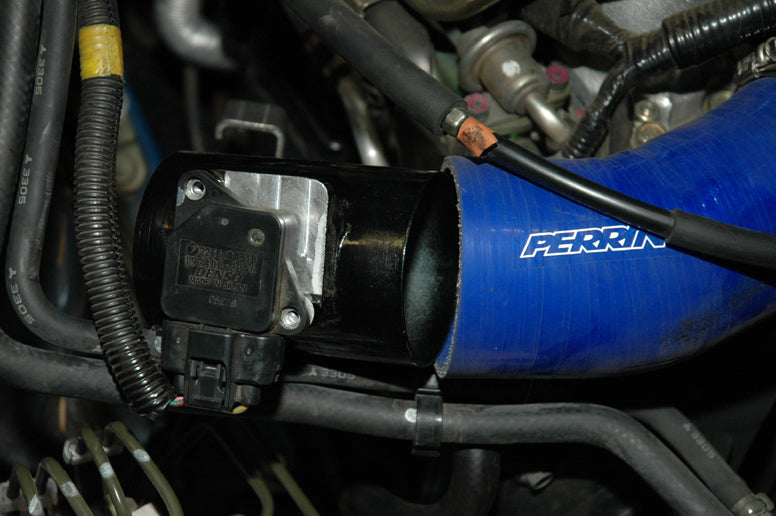
11. The support bracket should be captured by the hose clamp to support the MAF housing. Make sure that all the parts are aligned smoothly. You can rotate the parts into alignment if necessary. When the parts are aligned, tighten the hose clamps and the support bracket bolt.
12. Install the MAF in the new MAF housing and snug down its screws. Remember, if the orientation is wrong, it will not work correctly.
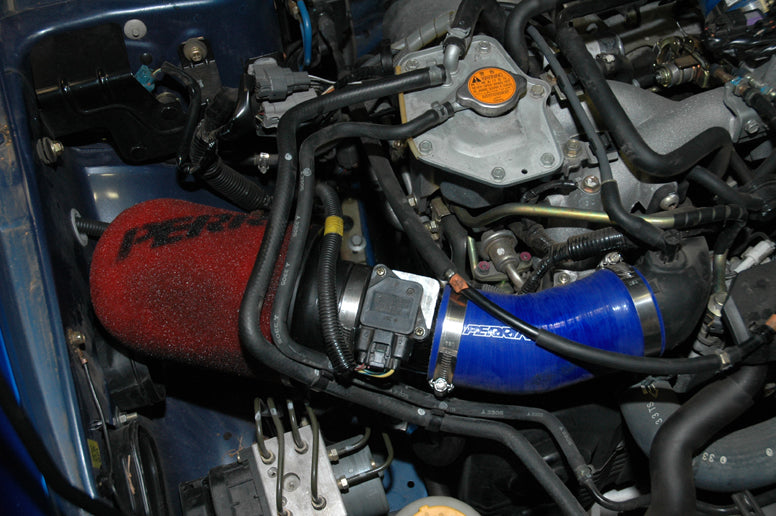
13. The air filter is a press-fit onto the open end of the MAF housing, and uses the third hose clamp to keep it snug. Depending on which filter you have, you may need to oil it or otherwise prepare it for use according to the manufacturer's instructions.
This is how your short ram air inlet setup should look when you're done.
14. Reconnect your battery, account for all your tools, and give your work a once-over to make sure everything's installed correctly and tightened down. Then start your engine and check everything again.
Find more tips like this in the book: HIGH-PERFORMANCE SUBARU BUILDER'S GUIDE
Get your copy here!
SHARE THIS ARTICLE: Please feel free to share this article on Facebook, in forums, or with any clubs you participate in. You can copy and paste this link to share: https://www.cartechbooks.com/blogs/techtips/subie_shortram